Help
How to use your hosting
Last updated October 1, 2026
Getting started
Everything below happens in the Panel (the Panel button at the top of every page once you’re logged in). Its Overview tab shows these steps and ticks them off as you go.
- Point your domain here first by changing its nameservers to your own two at your registrar (next steps below). This is also how you prove the domain is yours.
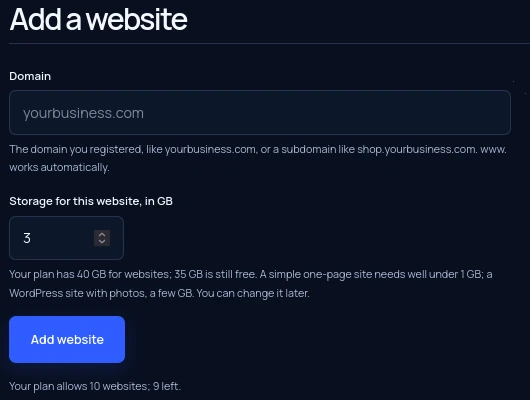
- Add your website: on the Websites tab, type your domain (for example
yourbusiness.com) and how much storage it gets. We suggest an amount. Your DNS and SSL then set themselves up; the website’s card shows how it’s going. - Install WordPress, Joomla or Drupal with one click from the website’s card, or upload your own site by FTP.
- Set up email on the Email tab, if your plan or add-ons include mailboxes or forwarders.
There’s also an advanced panel for rarer jobs (scheduled tasks, PHP settings and the like). Most people never need it; see Your logins.
Your logins
You have a few different logins, and they aren’t interchangeable:
| For | Where | Log in with |
|---|---|---|
| Websites, apps, email setup, DNS, FTP, backups, billing | librehost.dev account | Your account email and password |
| Advanced settings (scheduled tasks, detailed PHP settings) | Advanced panel, on request | Nothing extra: once it’s turned on for your account, it opens from the Panel, already logged in |
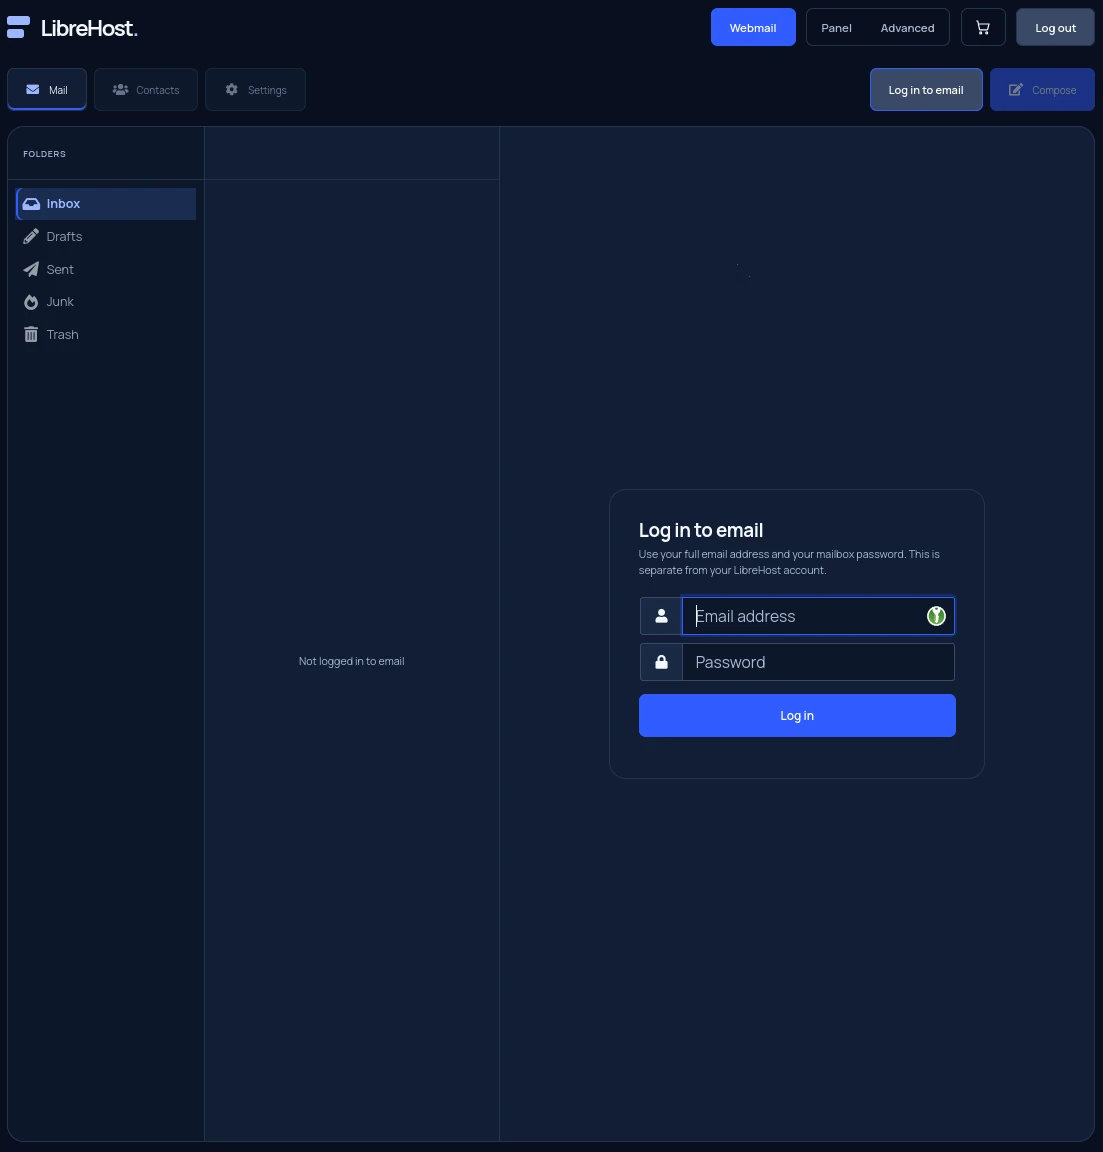
| Reading mail in a browser | Webmail | Your full email address (you@yourbusiness.com) and that mailbox’s password |
| Mail apps (phone, Outlook, Thunderbird) | See mail settings | Your full email address and that mailbox’s password |
| Uploading files | An FTP app | The FTP username and password from your website’s card |
Use an email address that isn’t hosted with us for your librehost.dev account, so you can still get your advanced panel codes if something is wrong with your hosting.
Too many wrong passwords in a short time blocks your connection for a while, for security. If that happens, wait it out and try again with the right login from the table above.
Pointing your domain here
At the company where you registered your domain (your registrar), change the domain’s nameservers to the two shown on your Panel’s Overview. They look like b7k2qx4m.ns.librehost.dev, they are yours alone, and they are also in your welcome email. Use the same two for every domain you add.
Why your own two? Only a domain’s owner can change its nameservers. When a domain shows your two names, we know it’s really yours, and nobody else on our servers can take it. You don’t need to create or register anything: at your registrar choose “custom nameservers” and type the two names.
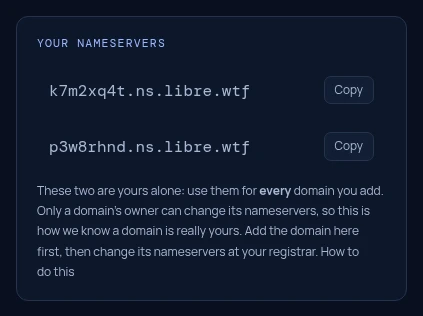
Change the nameservers first, then add the domain in the Panel (as a website under Websites, or under Email if you only use email). The Panel checks with the domain registry that your domain lists your nameservers, and only then accepts it, so nobody can add a domain they don’t control. Some registrars take a few minutes (sometimes a few hours) to pass the change on; if the Panel says it can’t see your nameservers yet, wait a little and try again.
As soon as the domain is added we set up the DNS your website needs: the address records, www, and the email security records (SPF and DMARC). The mail records (MX and DKIM) are added when you set up email for the domain on the Email tab, where you choose whether its email lives with us, Google or Microsoft.
Moving a website or email that already works somewhere else? From the moment the nameservers change, the domain stops answering from your old host and starts answering from us, so add the domain here straight away. Your old site and email are unavailable until the new one is ready, usually 10 to 30 minutes.
Check DNSSEC when you switch. If your domain has DNSSEC switched on, it has to be turned off when the nameservers change, or your domain stops working. Many registrars turn it off for you automatically when you change nameservers, but not all do, so check the DNSSEC setting (usually next to the nameservers) and turn it off if it’s still on. Even then, some visitors may not reach your site for up to a day while old DNSSEC records expire around the internet.
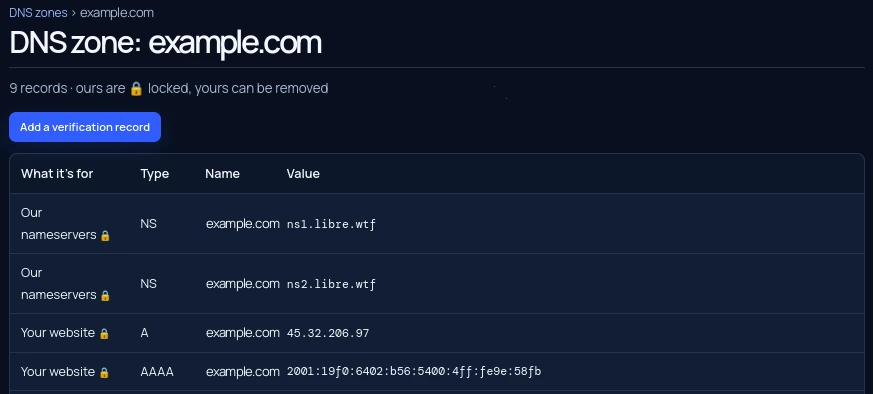
Your domain has to use your nameservers: that’s what lets us keep your website, email and SSL working without you touching DNS. Everything is set up to match your websites and email, and the Panel’s DNS tab shows every record, so you can see exactly what’s there.
Verification records
Services like Google, Microsoft, Stripe or Mailchimp sometimes ask you to add a DNS record to prove you own the domain, or to send email for you. Add those in the Panel: open DNS, open the domain’s zone, then Add a verification record:
- TXT records can go on the domain itself (type
@as the name) or any name, except the email security records we manage (SPF, DMARC and DKIM). - CNAME records can go on any name nothing else uses, like
k1._domainkeyorem1234. Not on the domain itself,www, or the names your websites and email use.
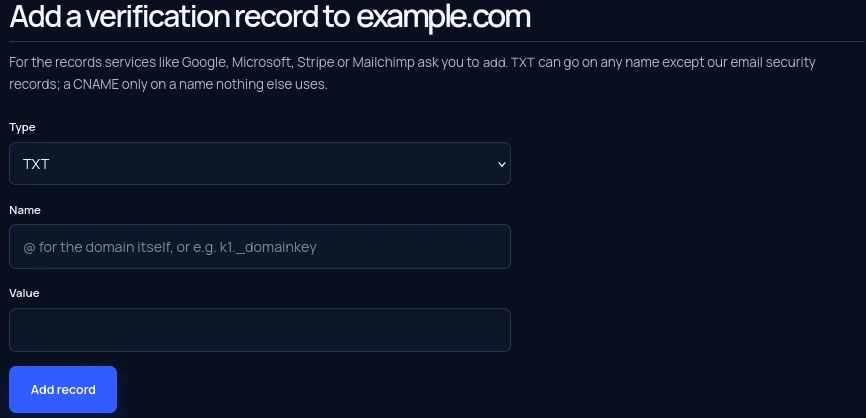
Records you add are marked “Added by you” and you can remove them any time. They’re live on our nameservers straight away; the rest of the internet can take up to an hour to see them.
Keeping your DNS somewhere else
Pointing your nameservers here is the easiest way, and the one we recommend: we then keep your website, email and SSL records right for you. If you would rather keep your DNS where it is (at your registrar, or a service like Cloudflare), you can:
- Show us the domain is yours. In your DNS settings add a TXT record named
_librehost(if your DNS company wants the full name,_librehost.yourbusiness.com) with the value shown on your Panel’s Overview, under “Prefer to keep your DNS where it is?”. It is the same value for all your domains. Wait a few minutes, then add the domain in the Panel. - Add the records your website and email need. Open the domain under DNS. It lists every record to create at your DNS company, and its last column checks each one against your DNS right now.
- Keep them in place. Without the address records your website won’t load, and without the email records (MX, SPF, DKIM and DMARC) your email may be refused or filed as spam. Keep the
_librehostrecord too: if it disappears we email you, and after two weeks we have to look at who the domain belongs to. When something changes here (you set up email, for example), we email you what to change at your DNS company.
Your DNS company runs your DNS, so problems there are yours to fix: the DNS page shows exactly what should be in place, but we can’t troubleshoot another company’s settings. You can switch to our nameservers at any time.
Email with Google Workspace or Microsoft 365
If your email is with Google Workspace or Microsoft 365 instead of us, choose that in the Panel under Email, Email domains, your domain, and we point its email records there. For Microsoft 365, paste the MX value its admin centre shows you. First delete any mailboxes and forwarders the domain has with us (same tab): they’d stop receiving mail. Then add the verification and DKIM records Google or Microsoft give you under DNS, Add a verification record.
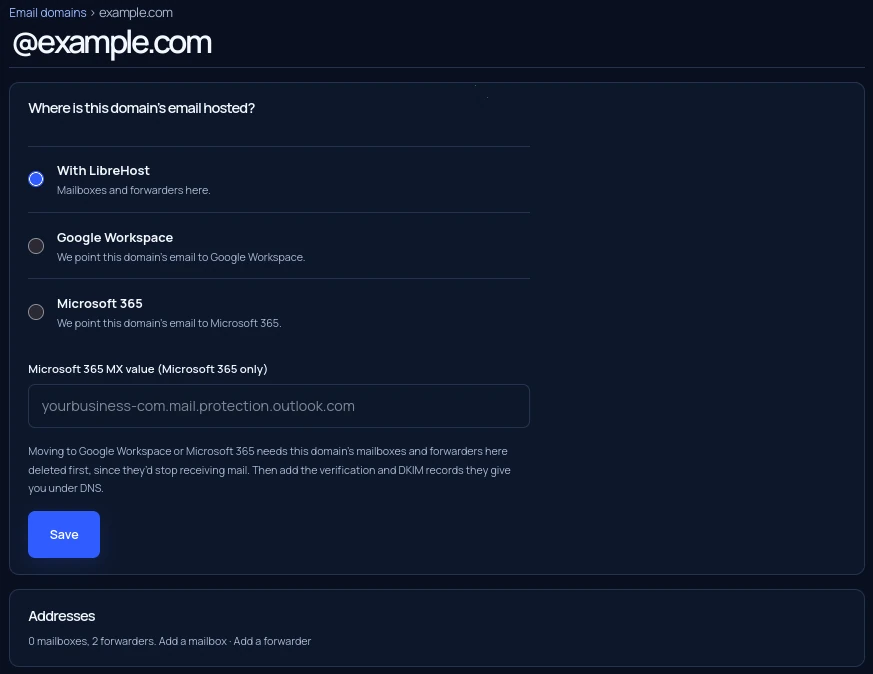
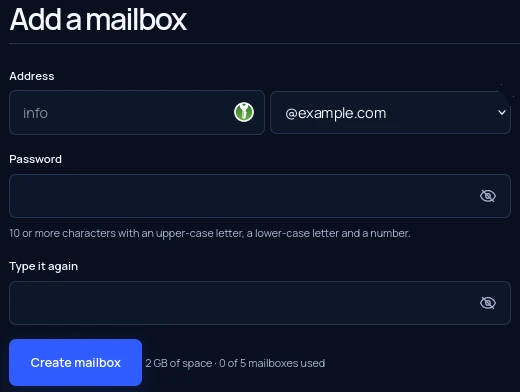
Create your mailboxes
- In the Panel, open the Email tab. Your website’s domain is already listed (email-only accounts add their domain there first).
- Under your domain, choose Add a mailbox, type the part before the @ (like
info) and a strong password. - Each mailbox has 2 GB of space. The same tab lets you change a mailbox’s password or delete it.

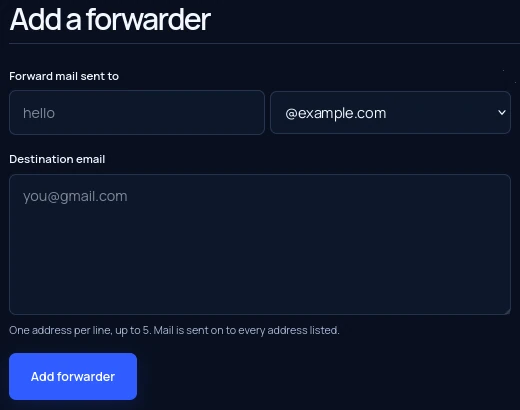
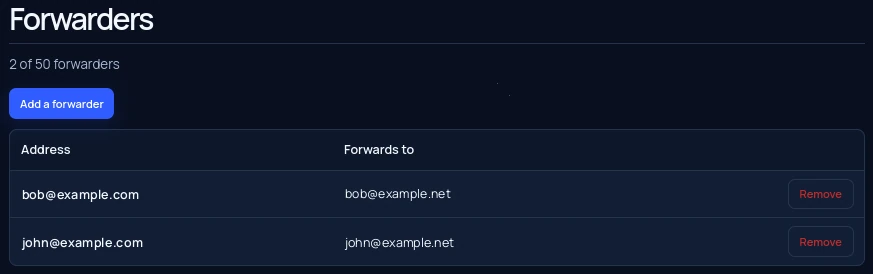
Forwarding: Add a forwarder sends mail for one address on to inboxes you already use, one per line, up to 5. Add one forwarder per address, for example bob@ to bob@gmail.com and info@ to another inbox. Your plan includes a set number of forwarders.
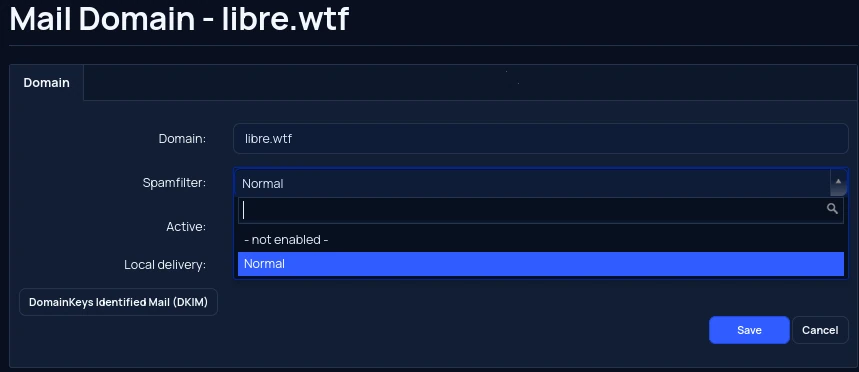
Spam filtering is on at the “Normal” level for every domain. To change it, use the advanced panel: Email, Domain, your domain, Spamfilter.
Mail app settings
When your mail app asks for server settings, enter:
| Server | Port | Security | |
|---|---|---|---|
| Incoming (IMAP) | mail.librehost.dev | 993 | SSL/TLS |
| Incoming (POP3) | mail.librehost.dev | 995 | SSL/TLS |
| Outgoing (SMTP) | mail.librehost.dev | 465 | SSL/TLS |
| Outgoing (alternative) | mail.librehost.dev | 587 | STARTTLS |
Username: your full email address. Password: that mailbox’s password. Choose IMAP if you read mail on more than one device.
Webmail: read mail in any browser at https://webmail.librehost.dev/, or open Webmail in the Panel.
Email isn’t backed up. Move anything you can’t lose into your mail app’s local folders.
Uploading your website
WordPress, Joomla or Drupal
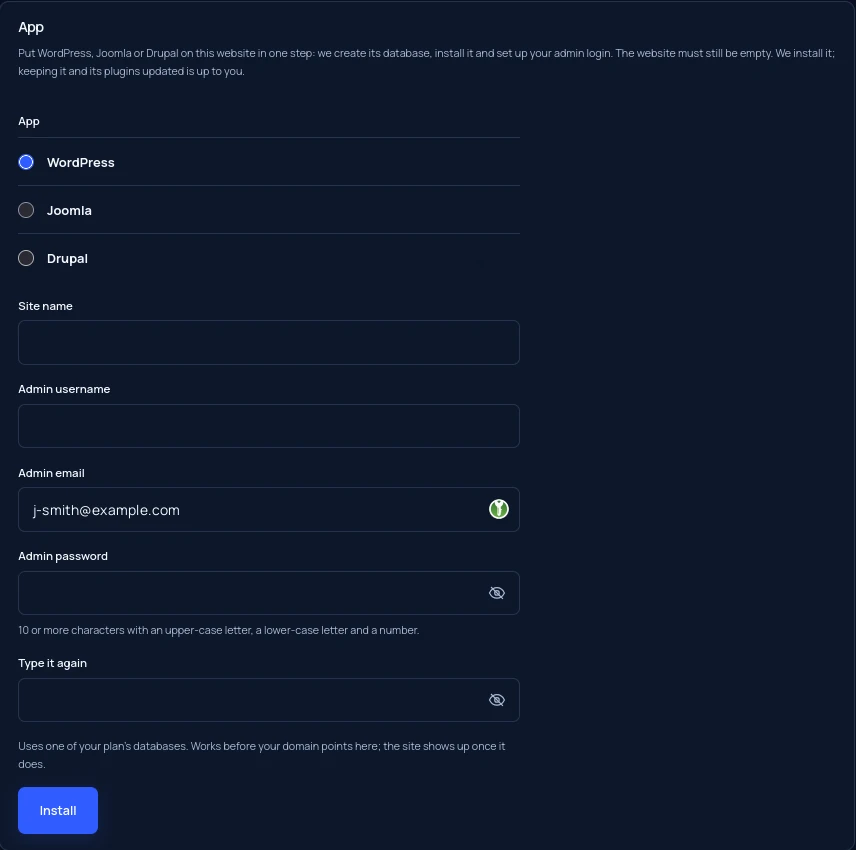
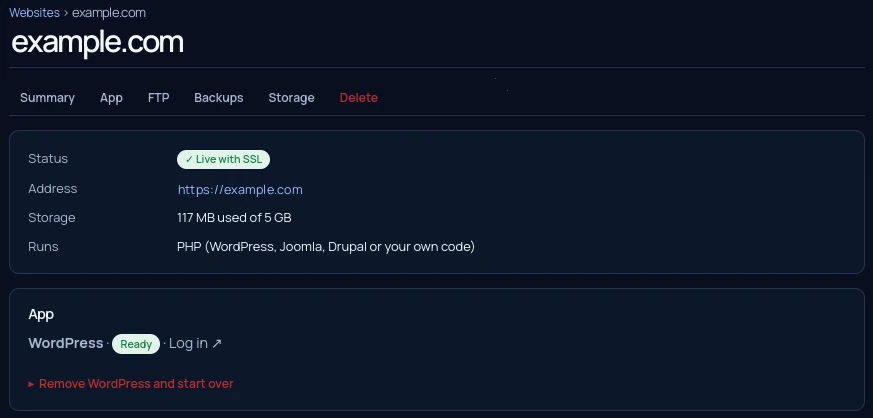
On plans with PHP websites: on the Websites tab, open your website’s card and choose Install WordPress, Joomla or Drupal. Pick the app, a site name and your admin login; we create its database and install it in a couple of minutes. The website must still be empty. Keeping the app and its plugins updated is up to you. Remove and start over on the card deletes it (and everything in the website) if you want to try another.
Files, by FTP
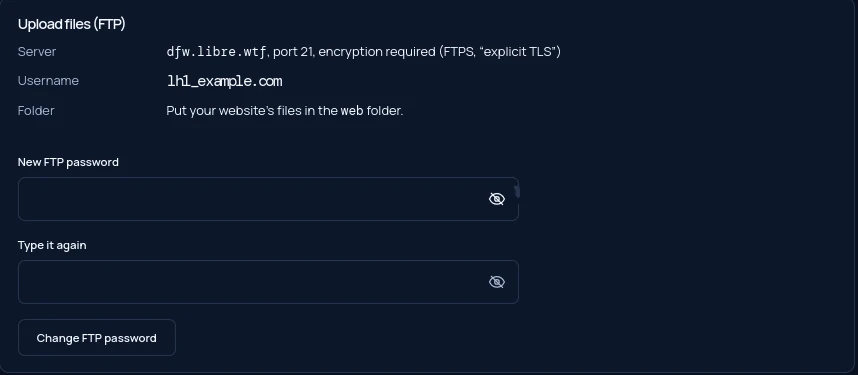
- On your website’s card, open Upload files (FTP) and set an FTP password. The card shows your FTP username.
- In an FTP app such as FileZilla, connect to
mail.librehost.dev, port 21, with “Require explicit FTP over TLS” (plain, unencrypted FTP isn’t accepted). - Put your website’s files in the
webfolder.
Databases for your own code
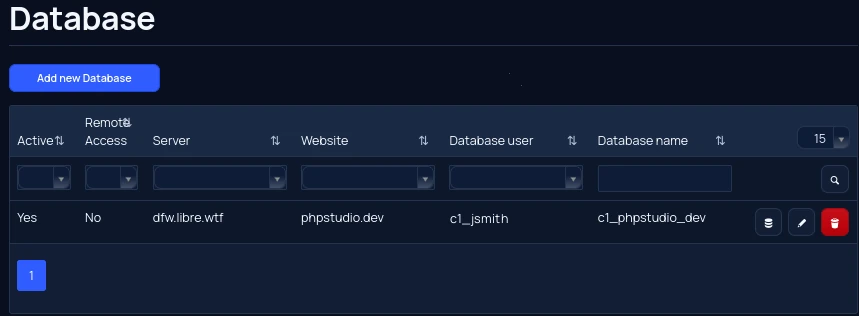
One-click apps create their own database. For your own code, create one in the advanced panel: Sites, Database User, then Database. The database server is localhost.
SSL (https)
SSL is included with every plan, and there’s nothing to do: once your domain points here, we install a free Let’s Encrypt certificate on each of your websites, usually within minutes, and renew it for you. Visitors are sent to the https:// address automatically.
If a new website still shows “Not secure” after an hour, check that your domain’s nameservers point to us (see above). We keep retrying on our own once they do.
Backups
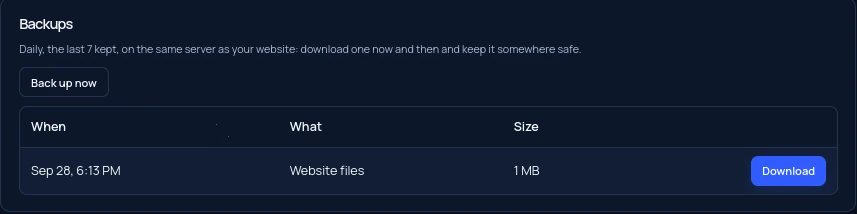
With the Automatic backups add-on, your websites and their databases are backed up every day and the latest 7 copies are kept.
To download a copy (please do this regularly, since the copies are stored on the same server as your website): on your website’s card, open Backups and choose Get a download link next to the copy you want. We email you when it’s ready, usually within a minute; download it from the same place within 24 hours and keep it somewhere safe. Back up now makes a fresh copy, handy before big changes.
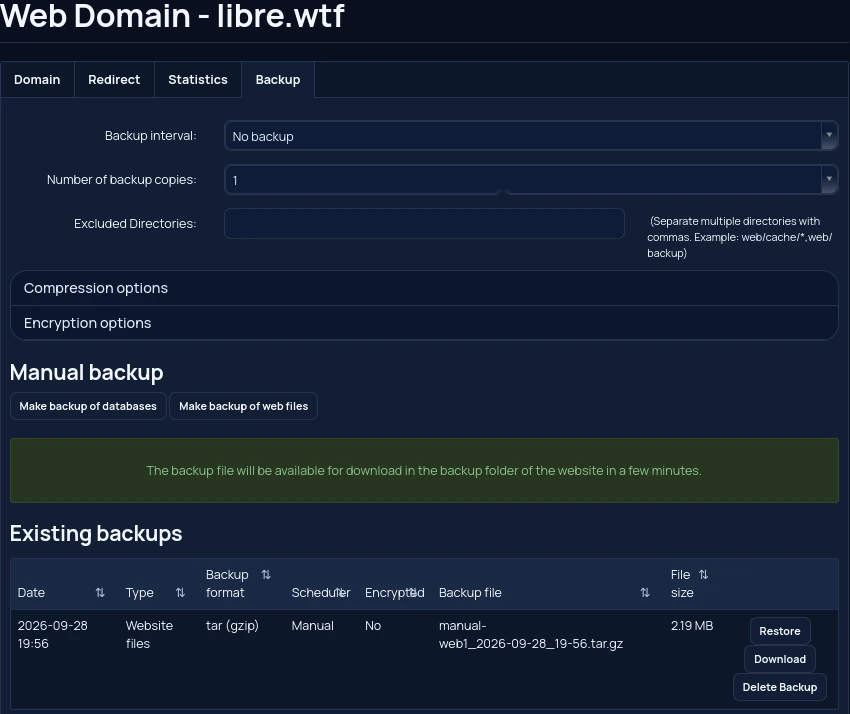
To restore a copy, use the advanced panel: Sites, Website, your website, the Backup tab, then Restore.
We email you a reminder once a month. Email isn’t included in backups.
Stats and the forum
Your Panel has two more tabs: Stats, the numbers for your websites, and Forum, where our customers help each other.
Counting the visitors to your website
- Open Stats, then Install. Each of your websites has its own line there.
- Copy the line and paste it into your website’s pages, just before the closing
</head>tag. In WordPress, Joomla or Drupal, use your theme’s header scripts setting or a “header code” plugin. - Open your website once. Within a minute or so Install says it is counting, and Summary shows the visit.
Nothing is counted until the line is on your pages. Stats counts people, not bots, sets no cookies and never stores IP addresses, and visitors who send Do Not Track aren’t counted at all.
The forum
Open Forum to read and post. The first time, you choose a username. Other members see it and what you post, never your email address. If your account is paused, the forum is paused with it.
Billing and your plan
- Upgrades and add-ons: from your account, under “Upgrade or add”. You see the exact charge before paying. Upgrades can’t be reversed.
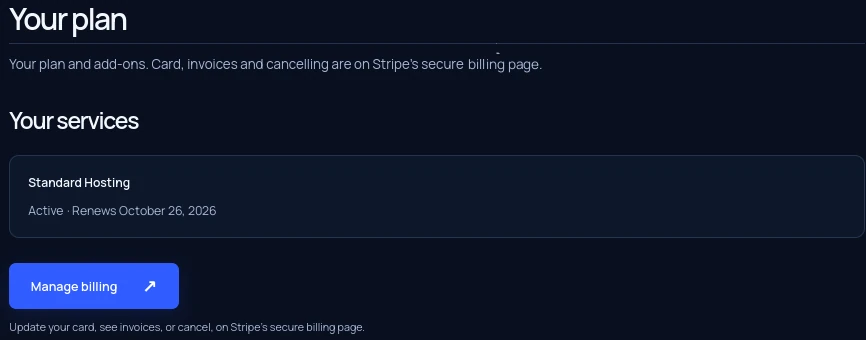
- Turning an add-on off: in the Panel, under Account, Your plan. It keeps working until the end of the time you’ve paid for.
- Card, invoices and cancelling: “Manage billing” in the Panel, under Account, Your plan, or at link.com.
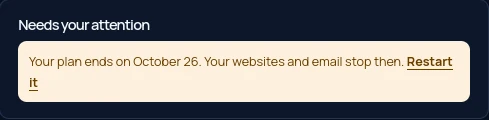
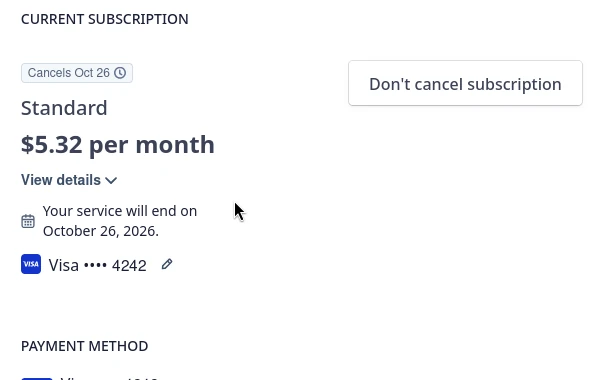
- Changed your mind after cancelling? Everything keeps running until the end of the time you’ve paid for, and you can come back any time before then: choose Restart it on your Overview (or Account, Your plan in the Panel), then Manage billing and “Don’t cancel subscription”. Your websites, email and settings stay exactly as they are, with nothing to set up again.
- On your card statement, charges show as LINK.COM* LIBRE.WTF. Payments are processed by Stripe and sold through Link, which also sends your receipts.
- If a payment fails, it’s retried for about two weeks while everything keeps running. If it still isn’t paid, your account is paused, and 30 days later it’s deleted. We email you before that happens.
- There are no refunds. See the refund policy.
Questions
Email info@librehost.dev or call 346-603-7077 Monday to Friday with questions about your account and our service. We don’t build or fix websites or troubleshoot software; for that kind of help, see our terms for the businesses that do.
What’s really happening in the background while you wait for your site to go live